Description
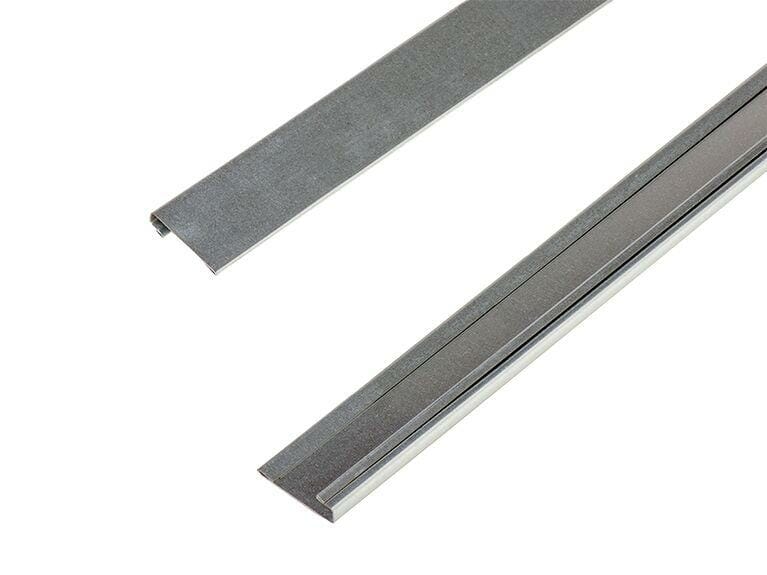
Before you install the composite cladding boards, you need to make sure they will be level. The wall cladding starter strip ensures everything is level before you start your project on the building’s exterior.
Designed using tough precision-made steel, these exterior cladding starter strips have been made to have increased corrosion and wear resistance from the elements, so you can trust the material will last over time.
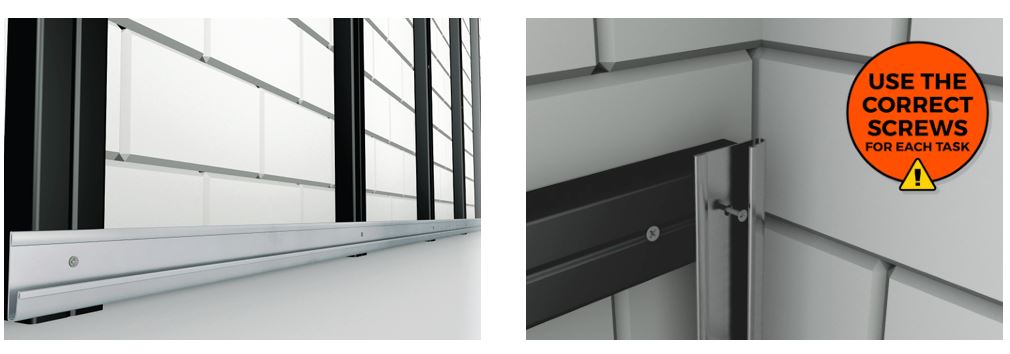
Measuring 3m long, 50mm high and 10mm deep, all you need to do is attach the wall cladding starter strip to the bottom of each batten that you have attached to your exterior wall, then slot the first wall cladding board into place. Easy!
Please note you will need to leave a minimum of 15mm between the floor and the starter strip for the wall cladding not to touch the floor.
You will also need to ensure the strip is perfectly level before installing the boards.
Product Specifications:
- Length: 3m
- Height: 50mm
- Depth: 10mm
- Each Starter Strip weighs approximately 1.32kg.
How Does the Starter Strip Attach?
For horizontal installation: Attach the starter strip to the bottom of each joist - this will give the first cladding board something to sit on. You will need to pre-drill a pilot hole into the composite batten and attach the starter strip using a screw that is at least 15mm long. Ensure that each strip is level with the next and that the first board sits level on the strips before continuing to the next step. Place the first wall cladding board on to the starter strips. Mark and then pre-drill pilot holes through the fixing groove of the board into the composite batten below.
For vertical installation: Attach the starter strip to the right side of each joist - this will give the first cladding board something to sit on. You may wish to pre-drill a pilot hole into the composite batten and attach the starter strip using a screw that is at least 15mm long. Ensure that each strip is level with the next and that the first board sits level on the strips before continuing to the next step. Place the first wall cladding board on to the starter strips. Mark and then pre-drill pilot holes through the fixing groove of the board into the composite batten below.

Payment & Security
Your payment information is processed securely. We do not store credit card details nor have access to your credit card information.
Request Samples
To request samples, please visit this page and fill out your details.
Some of Our Service Reviews
Customer Images
Trusted by thousands of UK customers 😊
You may also like
Some of Our Customer Reviews
View AllUS vs Other Brands
We pride ourselves on excellent customer service and highly trained staff who are on hand to assist you.
Perfect for trade & retail customers
Expert staff on hand to support
Efficient nationwide delivery network
No Minimum Order

