Composite slatted cladding has become one of the most popular exterior and interior wall finishes in the UK over the past few years; and it's easy to see why. It gives the look of architectural timber without the ongoing maintenance headache, and it handles the British weather far better than natural wood.
But how difficult is it to actually install? That depends on how well you prepare. Done properly, a composite slatted cladding installation is a satisfying DIY job for a competent homeowner, or a clean half-day's work for a trades professional. Done without the right prep, you'll end up with uneven boards, poor drainage, or fixings that don't hold.
This guide walks you through the full process — from choosing the right fixing method to finishing the edges neatly — so you get it right first time.
Quick Overview: Composite Slatted Cladding Installation at a Glance
| Stage | Key Considerations |
|---|---|
| Planning & measuring | Account for expansion gaps; measure twice |
| Surface preparation | Wall must be sound, level, and weatherproof |
| Subframe installation | Use treated timber or aluminium; maintain ventilation gap |
| Board fixing | Hidden clips or face-fixing depending on board type |
| Finishing | End caps, trims, and sealant for a clean result |
| Maintenance | Annual clean; no painting or staining required |
Tools and Materials You'll Need
Before you start, get everything together.
Stopping mid-install to track down a missing fixing or the right drill bit is how mistakes happen.
Tools:
- Tape measure and chalk line
- Spirit level (long — at least 1.2m)
- Circular saw or mitre saw with a fine-tooth blade suitable for composite materials
- Drill and appropriate driver bits
- Rubber mallet
- Safety gloves
- Safety glasses and dust mask (composite produces fine dust when cut)
Materials:
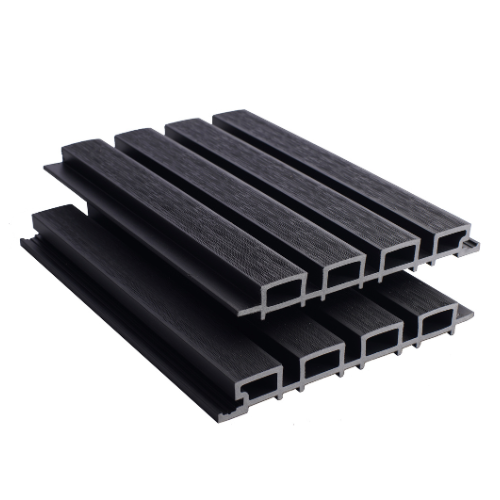
- Composite slatted cladding boards
- Subframe timber (treated softwood 50×50mm or 50×75mm) or aluminium battens
- Fixing screws or hidden clip system (supplied or recommended by the manufacturer)
- Stainless steel or coated screws (avoid untreated steel — it will rust and stain)
- End caps or trim pieces (check the manufacturer's range)
- DPC (damp proof course) tape if fixing to masonry
- Expansion gap spacers
Step 1: Plan Your Layout and Measure Accurately
This is the step most people rush, and it's where most problems actually start.
Start by measuring the total area you're cladding — height and width — and sketch a simple plan. Decide whether your boards will run horizontally or vertically. Horizontal is the most common choice for exterior walls as it emphasises width and sheds water naturally.

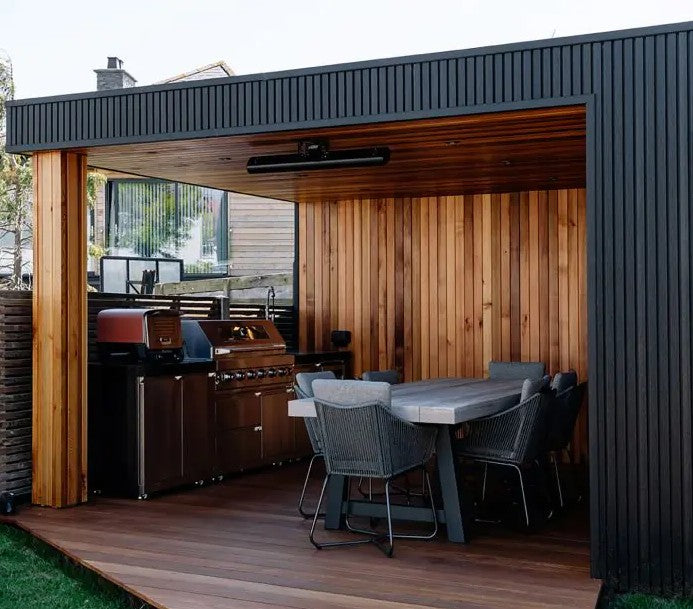
Above is a vertical installation of the teak slatted boards.
Vertical gives a more contemporary, elongated look and works well on feature walls or smaller panels.
Working out your board count:
Divide the total height (for horizontal install) by the board width, remembering to include any required spacing gap between boards.
Many slatted cladding profiles are designed with a visible gap between boards for drainage and airflow — this is intentional and should be maintained as specified. A 5–10mm gap between boards is typical.
Important: Composite expands and contracts with temperature. Always follow the manufacturer's guidance on expansion gaps at the ends of each board. In the UK climate, 5mm at each end is the standard minimum. On longer boards or south-facing elevations exposed to direct sun, you may need more.
Step 2: Prepare the Wall Surface
The wall behind your cladding needs to be structurally sound before anything goes on. Check for any crumbling render, loose brickwork, or areas of dampness. Address these before you start — cladding over a damp or unstable wall will cause problems down the line.
If you're fixing to timber frame, ensure the sheathing is intact and any existing breather membrane is undamaged. Repair or replace it if not.
For masonry walls, check that the surface is approximately plumb. Minor undulations can be corrected by shimming your subframe, but if the wall is significantly out of true you'll need to pack individual battens to bring everything into line before fixing boards.

Step 3: Install the Subframe (Battens)
The subframe is the foundation of the whole installation. It serves three purposes: it provides a flat, level surface to fix boards to; it creates a ventilation cavity behind the cladding; and it allows any water that gets behind the boards to drain freely.
For a horizontal board installation, your battens run vertically. Space them at 400–600mm centres depending on board length and manufacturer guidance. Longer boards or hollow-core profiles may need support at closer intervals to prevent flex.
For a vertical board installation, battens run horizontally — but you'll need to create a counter-batten system in most cases to maintain the drainage cavity and ensure adequate ventilation.
Fixing the battens:
- Mark fixing positions on the wall with a chalk line
- Use a masonry drill and appropriate fixings for brick or block; use timber screws direct to stud for timber frame
- Check each batten with a long spirit level before fixing fully
- Maintain a minimum 25mm air gap between batten back and wall surface — this is critical for ventilation and moisture management
If the wall surface is exposed masonry with no existing DPC at the batten contact points, apply DPC tape behind each batten to prevent moisture transfer.
Step 4: Fix the Starter Strip or Bottom Rail
Most composite cladding systems include a starter strip or bottom rail that the first board clips or rests into. This sets the line for the entire installation, so getting it right is essential.
Fix the starter strip at the correct height above ground level — typically a minimum of 15mm clearance above any hard surface such as a patio or composite decking. This prevents the base of the boards from sitting in standing water.
Use a long spirit level to ensure the starter strip is perfectly level across its full length. Even a few millimetres of error here will compound as you work upward, and the top course will be visibly out of line.
Step 5: Install the Cladding Boards
This is the most satisfying part of the process. With a level subframe and a good starter strip in place, the boards should go on smoothly and consistently.
Hidden clip system (most composite cladding):
The majority of quality composite slatted cladding systems use a hidden clip fixing method. Clips are inserted into the groove at the top or side of each board and screw into the batten. The next board then slots over the clip, hiding the fixing entirely.
This method gives a clean, fastener-free face and is the best option for most installations. Work methodically from bottom to top, checking level every two or three boards and adjusting if needed.
- Slot the first board into the starter strip
- Insert clips into the top groove at each batten position
- Fix clips with appropriate screws — do not overtighten; the board needs to move slightly with thermal expansion
- Slot the next board over the clips and press firmly until it clicks into place
- Check level, adjust if needed, and repeat
Face-fixing:
Some profiles — particularly solid boards or certain decorative slatted panels — require face-fixing with screws. In this case, pre-drill to avoid splitting, use stainless or coated fixings only, and consider colour-matched plastic plugs or caps if a tidy finish is important. Face-fixing is more straightforward but less visually refined than hidden clips.
Cutting boards:
When you reach the end of a run or need to cut around obstacles, use a fine-tooth blade and support the board fully along its length to prevent chipping.
Always cut with the face side down if using a circular saw, or face side up with a hand saw, to minimise visible tear-out. Lightly sand any cut edges if they'll be visible.
Remember your expansion gaps at the ends — don't butt boards tight against walls, trims, or corners.
Step 6: Work Around Obstacles and Openings
Windows, doors, pipes, and external sockets all need careful cutting and finishing. Measure each cutout precisely and cut incrementally — it's much easier to remove a little more than to fix a board you've cut too much from.
For pipes and circular penetrations, a hole saw or jigsaw works well. Always seal any penetrations with appropriate external-grade sealant to prevent water ingress behind the boards.
Where cladding meets a window or door frame, use a composite or colour-matched aluminium trim rather than leaving a raw edge. This looks far more professional and prevents moisture getting into the end grain — or in the case of composite, the hollow core.
Step 7: Finish the Edges and Corners
The difference between a job that looks professional and one that looks DIY usually comes down to how the edges and corners are handled. Did you know we produced a guide on installing composite corner trims?
Most manufacturers produce a full range of finishing accessories:
- End caps — slide or clip onto the open ends of hollow-core boards
- Internal corner trims — create a neat junction where two panels meet at an inside corner
- External corner trims — mitre or wrap around outside corners for a clean finish
- J-trim or starter trims — finish the top and side edges of a panel neatly
Avoid mitring composite boards at corners if you can — composite doesn't hold a mitre as crisply as timber, and the joint will look rough over time. Use the manufacturer's corner extrusions instead. We also have a full maintenance guide which you can view here.
Apply end caps with a small amount of appropriate adhesive if they're not a tight friction fit, and ensure all exposed cut edges are capped or trimmed.
Common Mistakes to Avoid
| Mistake | Why It Matters | How to Avoid It |
|---|---|---|
| Insufficient expansion gaps | Boards buckle in summer heat | Always follow manufacturer's minimum gaps |
| Poor ventilation gap | Moisture builds up, potential damp issues | Maintain 25mm+ cavity behind subframe |
| Using untreated steel fixings | Rust stains board face and weakens fixing | Use stainless or manufacturer-specified fixings |
| Skipping starter strip level check | Top of panel visibly out of line | Check level across full width before fixing |
| Cutting without face-down technique | Chipped or torn board faces | Use fine-tooth blade; cut face-down with circular saw |
| Not capping cut ends | Water ingress into hollow core | Always cap or trim every exposed end |
Maintenance After Installation
One of the main selling points of composite cladding is how little upkeep it needs. But "low maintenance" doesn't mean "no maintenance."
An annual clean with warm soapy water and a soft brush will keep the boards looking good and prevent any organic matter — algae, pollen, bird mess — from building up in the grooves. Avoid pressure washers on the highest settings, which can force water behind boards and damage clip fixings.
Check fixings, trims, and sealant lines every couple of years. Composite boards are durable, but if a trim works loose or sealant around a penetration degrades, water can track behind the panel and cause structural issues with the wall or subframe over time.
Costs: What to Budget For
Installation costs vary significantly depending on board quality, fixing system, and whether you're doing it yourself or using a contractor.
| Cost Element | Approximate Range (UK, 2024) |
|---|---|
| Composite slatted boards | £25–£80 per m² (supply only) |
| Subframe timber | £5–£12 per linear metre |
| Fixings and clips | £2–£6 per m² |
| Professional installation (labour) | £30–£55 per m² |
| Total installed (mid-range product) | £70–£130 per m² |
Entry-level composite products often use lower wood fibre content and may fade or expand more dramatically than premium alternatives. If longevity and appearance matter — and they should — it's worth spending more on a capped or co-extruded composite from a reputable supplier.
FAQs: Composite Slatted Cladding Installation
Can I install composite slatted cladding myself, or do I need a professional? Most composite slatted cladding systems are designed to be DIY-friendly, and a competent homeowner with basic carpentry skills can achieve excellent results. The key is careful preparation — particularly the subframe and starter strip. If the wall is significantly out of plumb or there are complex rooflines and obstacles to work around, a professional installer will save time and avoid costly mistakes.
How long does composite cladding installation take? For a straightforward panel of 15–25m², allow a full day for a DIY installation if you're working alone, or half a day with two people. Professional installers typically work faster, but time also depends on wall complexity, number of obstacles, and whether the subframe needs significant packing to level it.
Do composite cladding boards need to be sealed? Most composite slatted cladding boards don't require sealing on the face — the manufacturing process makes them inherently resistant to moisture. However, any cut ends should be sealed with the manufacturer's recommended end-sealant or capped with end-cap accessories to prevent water entering the hollow core.
What's the difference between capped and uncapped composite cladding? Uncapped composite has an exposed wood-polymer core on all faces. Capped (or co-extruded) composite has an additional protective polymer shell over the board, which significantly improves fade resistance, scratch resistance, and moisture protection. For exterior cladding in the UK, capped composite is almost always worth the extra investment.
Can composite slatted cladding be installed vertically as well as horizontally? Yes. Most composite cladding products can be installed in either orientation. Vertical installation requires a counter-batten system to ensure adequate ventilation behind the boards. Always check the manufacturer's technical documentation — some products have directional grooves that must run at right angles to the ground for water to drain correctly.
How do I clean composite slatted cladding? Warm water, washing-up liquid, and a soft-bristled brush is usually all you need. For stubborn marks or algae growth, a composite-specific cleaner is a better choice than a generic household product. Rinse thoroughly after cleaning. Avoid wire brushes or abrasive pads, which can scratch the surface, and use pressure washers on a low setting only.
Conclusion
Composite slatted cladding is one of the most effective ways to transform an external wall — whether that's a house elevation, a garden room, or a boundary feature. It looks sharp, lasts for decades with minimal effort, and handles the UK's wet and variable climate reliably well.
The installation itself isn't complicated, but it does reward careful preparation. Get the subframe level, allow for expansion, use the right fixings, and cap every cut end — do those four things consistently and the rest of the process will follow naturally.
If you're weighing up board options, take time to compare capped versus uncapped products and consider the full accessory range before you commit. A cladding system that has matching trims, clips, and corner pieces from the same manufacturer will always look more cohesive than a mix-and-match approach.
For product options, installation accessories, or help speccing the right system for your project, browse our composite cladding collection or get in touch with our team.

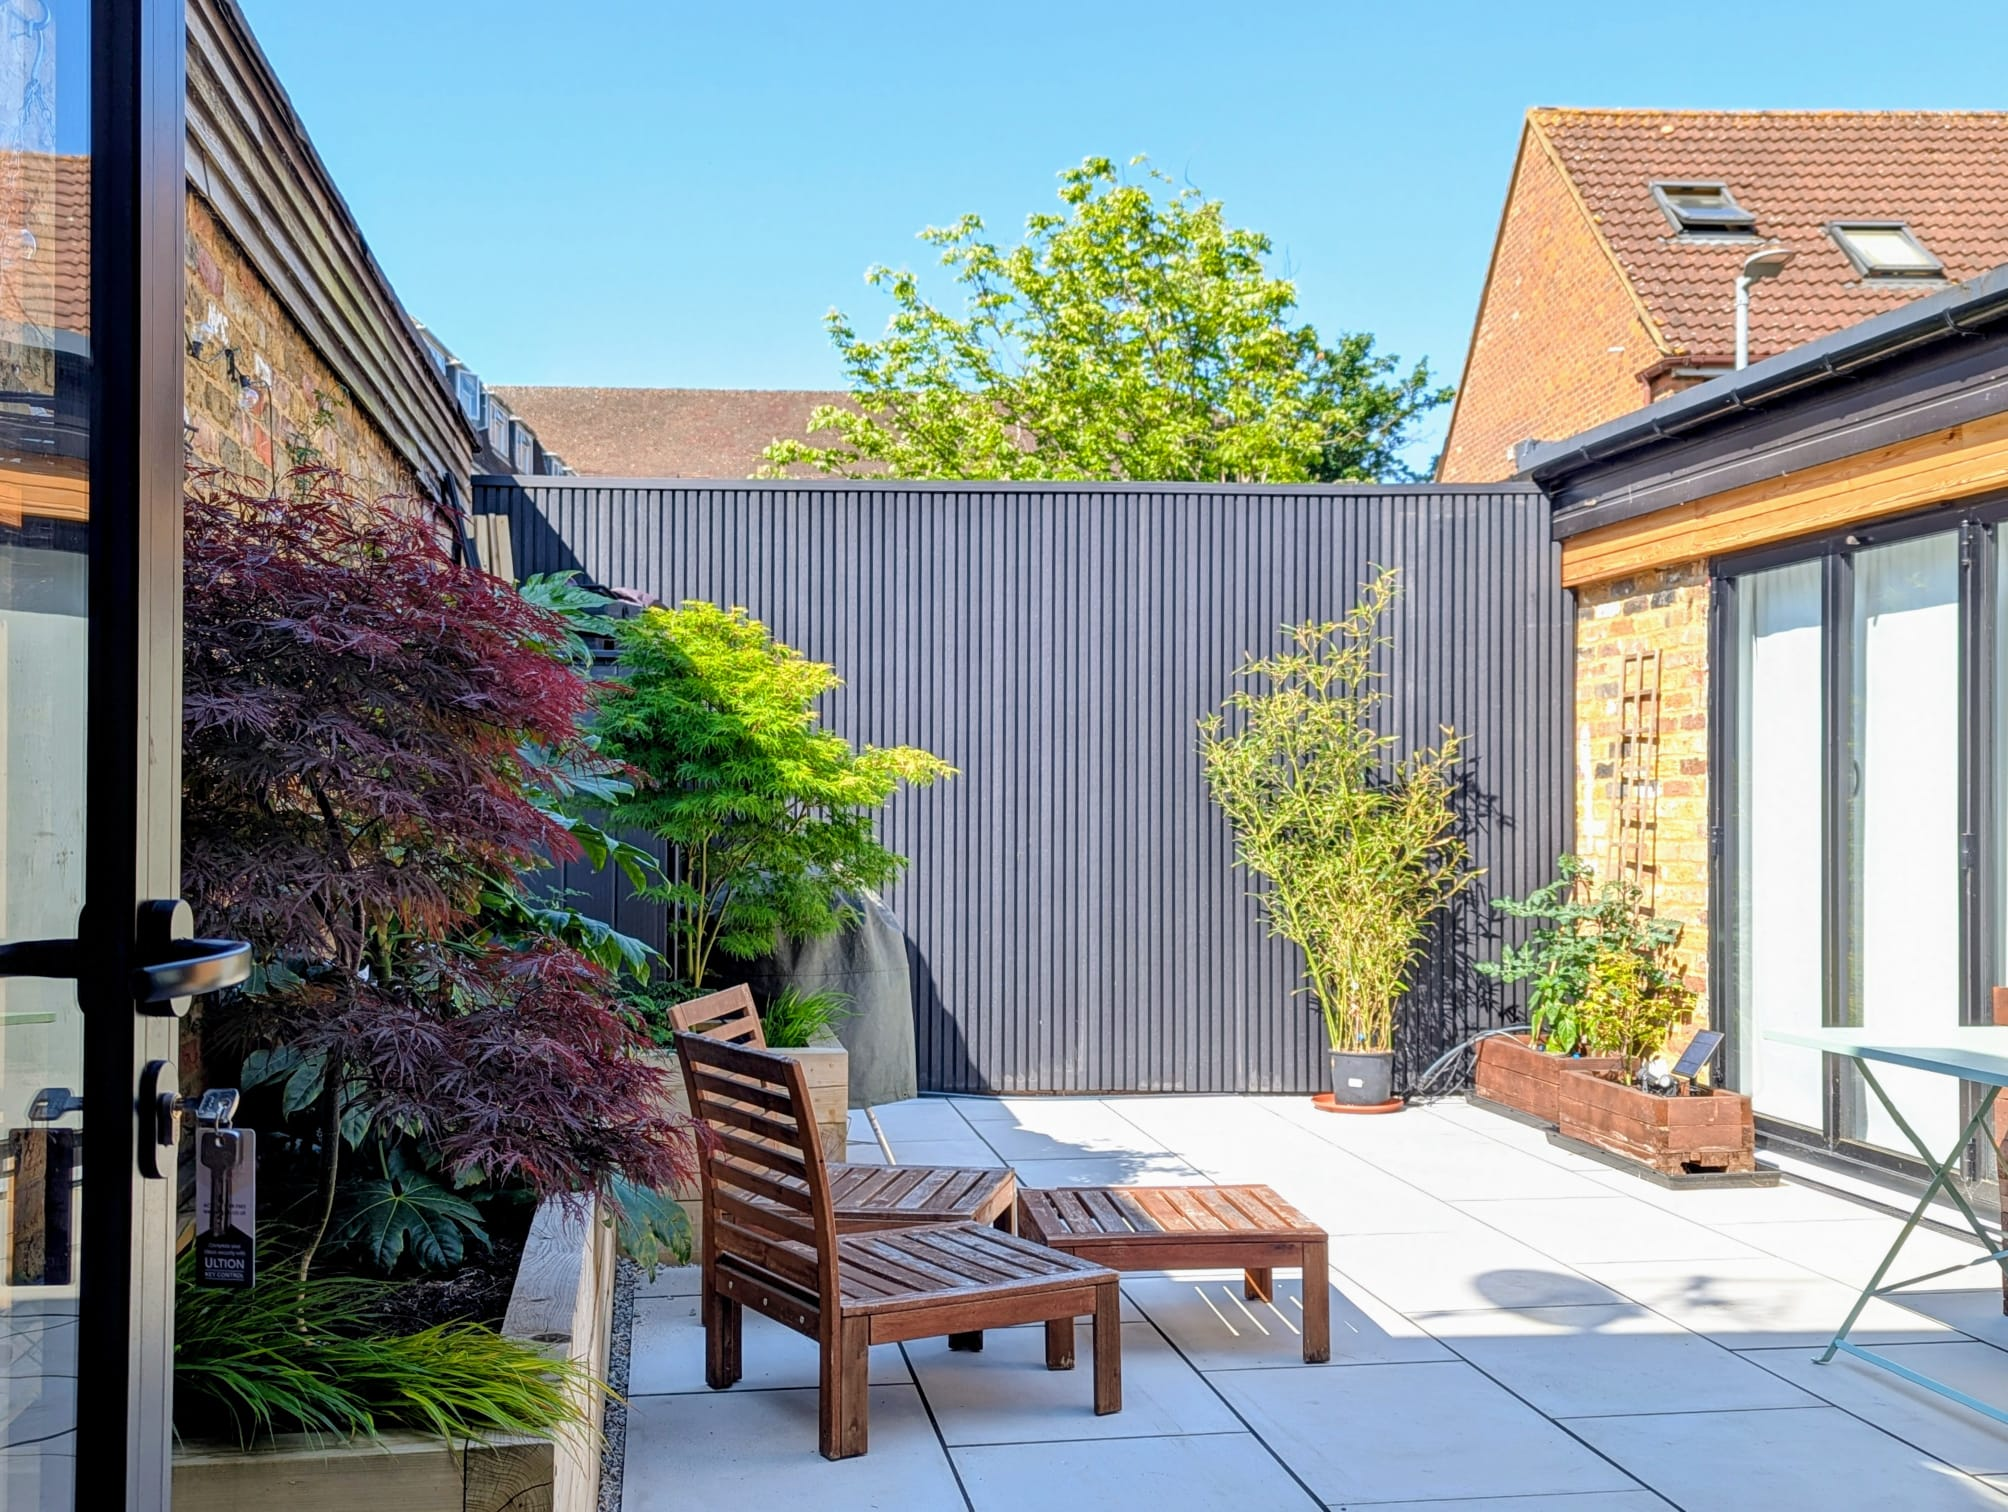
Above is the black (Charcoal) slatted cladding boards on a UK property.